How to print to PDF using SAP UI5
Introduction
In this post I'm going to show you have to take your UI5 application and create a PDF version of that UI5 application using HTML2PDF.
HTM2PDF
We're going to be using HTML2PDF which is taken from the linked github.io page as follows:
html2pdf.js converts any webpage or element into a printable PDF entirely client-side using html2canvas and jsPDF.
This means that we're going to want to include a 3rd party library which I've covered a couple of times on this blog already, typically you'll want to add this locally within your project files as I describe in my other blog How to include a third party barcode generator in ui5.
Which UI5 application are we using?
As typical within my blogs we're just going to make and use a simple UI5 application base, in this particular application I've added a bunch of microcharts because they're visually appealing for our PDF.
What does our simple application look like?
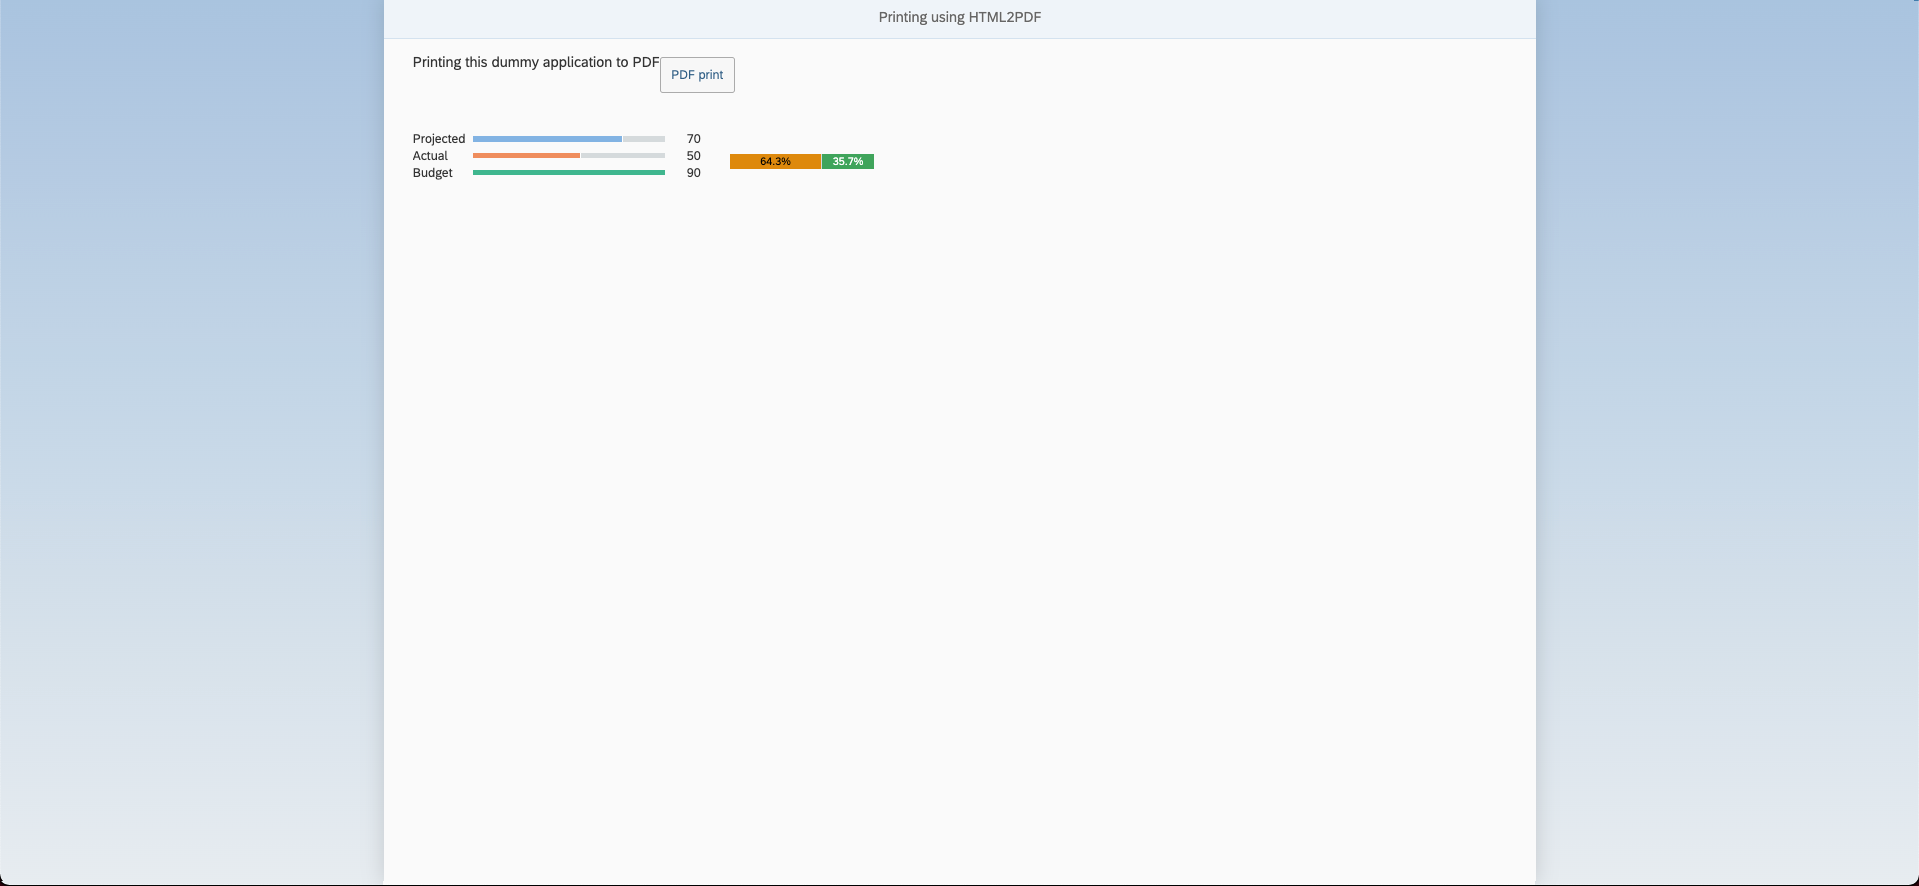
What about the XML code?
<mvc:View controllerName='nathan.hand.pdf.print.controller.mainView' xmlns:chart='sap.suite.ui.microchart' xmlns:html='http://www.w3.org/1999/xhtml' xmlns:mvc='sap.ui.core.mvc'
    displayBlock='true' xmlns='sap.m'>
    <App>
        <pages>
            <Page title='Printing using HTML2PDF'>
                <content>
                    <VBox id="SAPUI5content">
                        <HBox class='sapUiSmallMargin'>
                            <Title class='sapUiSmallMarginBegin' text='Printing this dummy application to PDF' />
                            <Button press="onPressPrintToPDF"  text="PDF print"/>
                        </HBox>
                        <HBox class='sapUiSmallMargin'>
                            <chart:ComparisonMicroChart view='Wide' class='sapUiSmallMarginBegin' tooltip='{i18n>BudgetedTotalHours}' width='21rem'>
                                <chart:data>
                                    <chart:ComparisonMicroChartData title='Projected' displayValue='70'
                                        value='70' color='#82b3e3'/>
                                    <chart:ComparisonMicroChartData title='Actual' displayValue='50'
                                        value='50' color='#EF8D5D'/>
                                    <chart:ComparisonMicroChartData title='Budget' displayValue='90'
                                        value='90' color='#3FB68E'/>
                                </chart:data>
                            </chart:ComparisonMicroChart>

                            <chart:StackedBarMicroChart class='sapUiSmallMargin' width='10rem' height='3rem' size='Responsive'>
                                <chart:bars>
                                    <chart:StackedBarMicroChartBar value='90' valueColor='Critical'/>
                                    <chart:StackedBarMicroChartBar value='50' valueColor='Good'/>
                                </chart:bars>
                            </chart:StackedBarMicroChart>
                        </HBox>
                    </VBox>
                </content>
            </Page>
        </pages>
    </App>
</mvc:View>
defining our onPressPrintToPDF function
Inside of your controller we're going to define our onPressPrintToPDF as that's what's called when we press our button.
Setting the options
Inside of this function we need to define our printer options which is as follows:
const oOptions = {
    margin: [0.3,0,0.5,0],
    filename:     'testing-pdf-print-nathan.pdf',
    image:        { type: 'jpeg', quality: 0.98 },
    html2canvas:  { scale: 2 },
    jsPDF:        { unit: 'in', format: 'letter', orientation: 'l' },
    pagebreak: { avoid: 'tr' }
};
The full list of options, configs and what you might want to adjust can be found on the docs but this is a pretty typical example.
Grabbing our content
Inside of our XML you might have noticed that I had a VBox defined with the id of "SAPUI5content". We need an id so we can grab the html and to do that you need to add the following of code:
const element1 = this.getView().byId("SAPUI5content").getDomRef();
Note how you will want to adjust the byId parameter to whatever ID you're grabbing for your content.
Printing the PDF!
To print the PDF we need to call html2pdf, set the options, pass the element and save so pretty simply done in one line:
html2pdf().set(oOptions).from(element1).save();
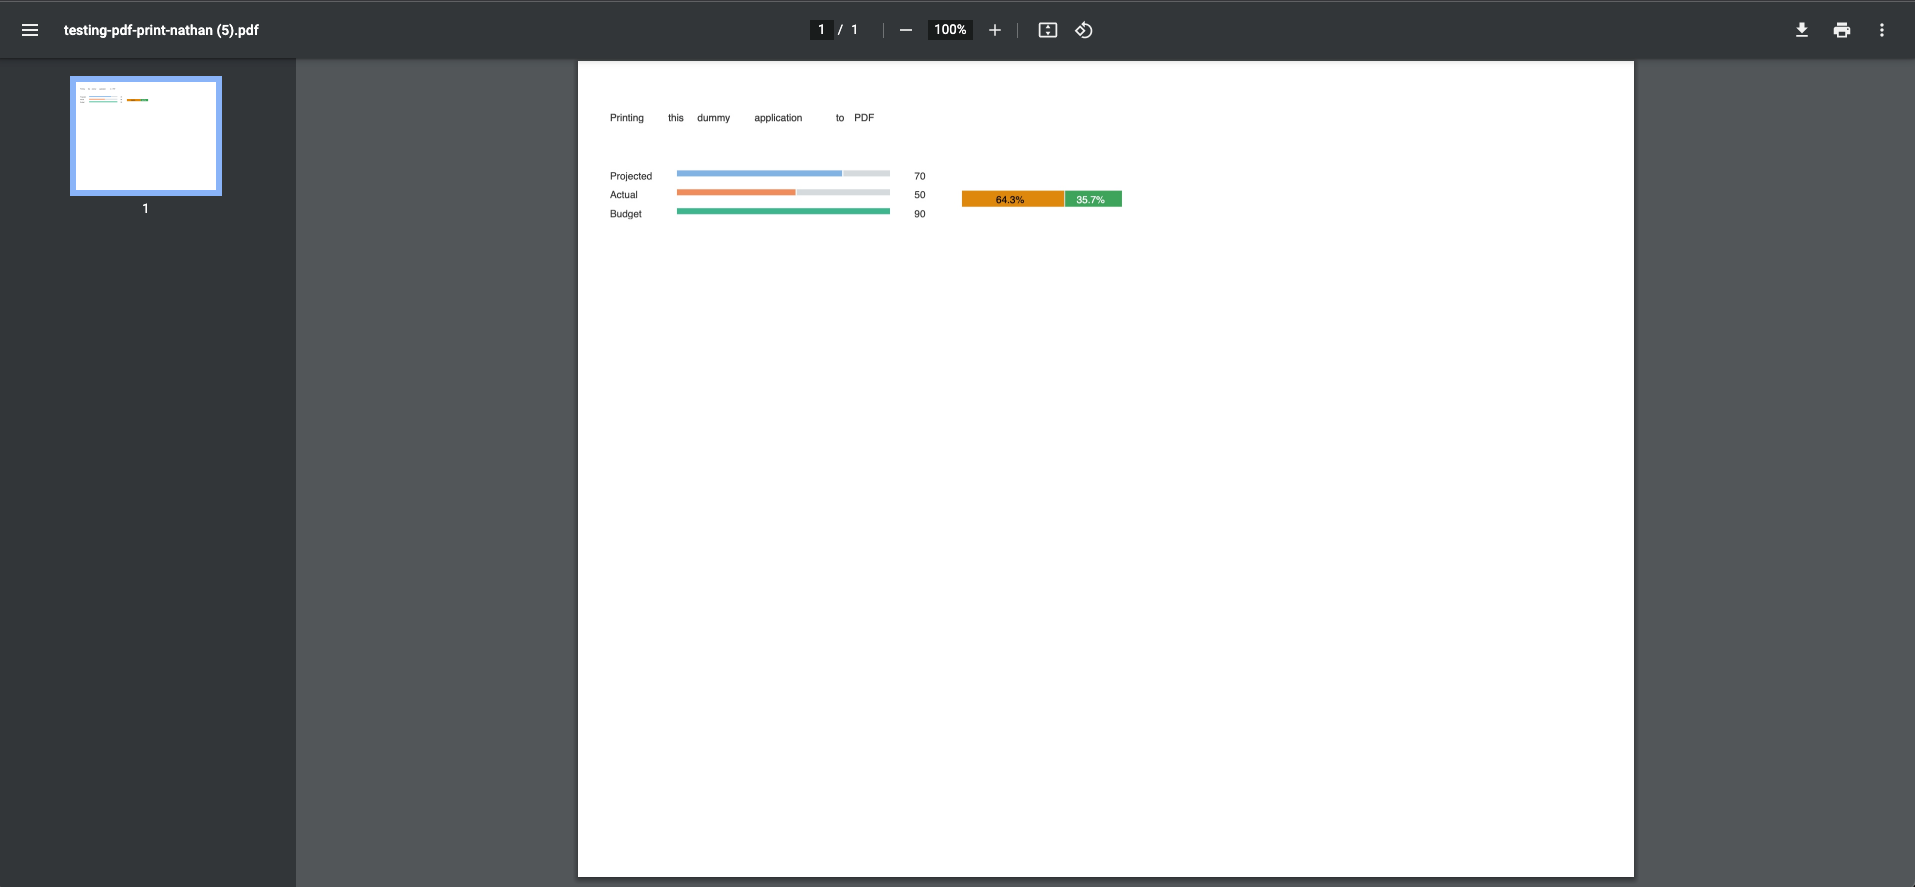
The printed PDF result

Yay! we've successfully made a PDF with our library! Things aren't a perfect representation of what we saw in the application which might mean we need to adjust some CSS rules but overall it's working great so far.
I however don't like that the button is still inside of our pdf print, you might also want to remove other items within the printed version that don't make sense but I suspect these will mostly be buttons.
Setting up for removing the button
Making a "settings" JSONModel
We're going to take advantage of some very simple model binding to hide/ show the button just before and after the PDF capture, so this means we need to make a new JSONModel.
Inside of an appropriate function (I chose the "onAfterRendering" function as this is a standard lifecycle event) we need to set our JSONModel using the following line:
this.getView().setModel(new sap.ui.model.json.JSONModel({"visible" : true}), "settings");
Binding to the button visible property
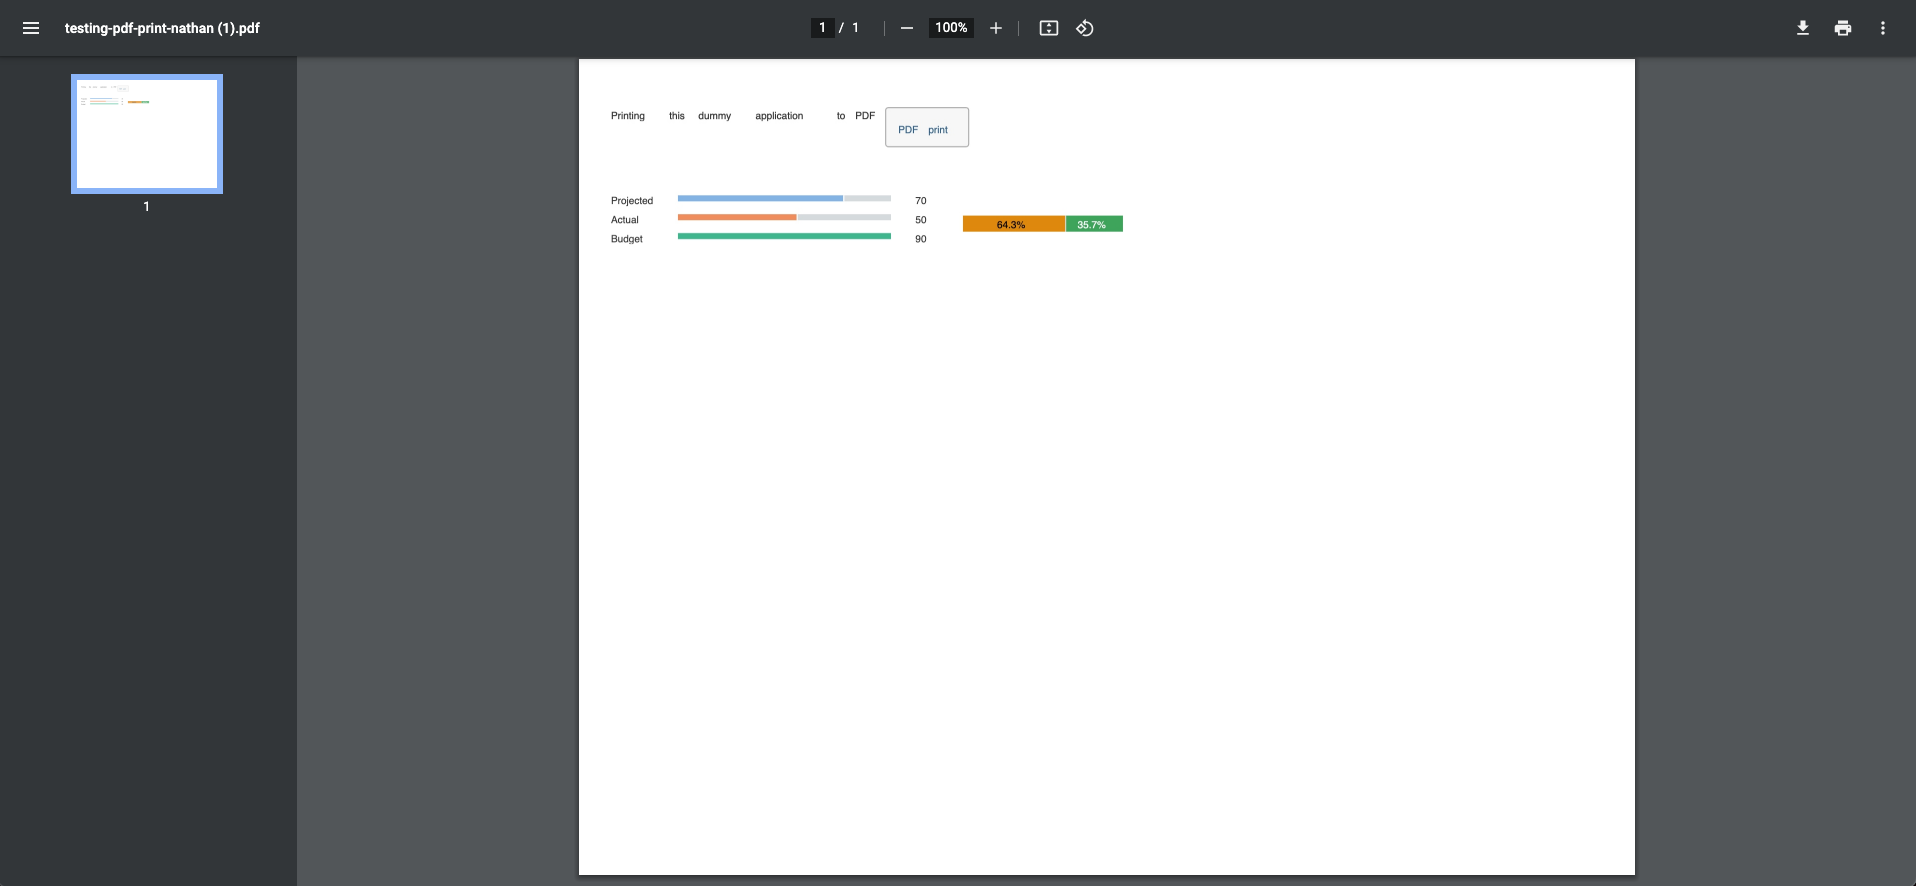
Inside of our View we need to bind the "visible" property to the settings model and "visible" key/ value that we've defined, this is gives us the following line:
<Button visible="{settings>/visible}" press="onPressPrintToPDF" text="PDF print"/>
Changing our visibility at the start and end of our pdf print.
Inside of our "onPressPrintToPDF" function we need to then set our visible setting to "false" and then after our printer set it back to "true".
Setting to false:
this.getView().getModel("settings").setProperty("/visible", false);
Setting to true:
this.getView().getModel("settings").setProperty("/visible", true);
Which gives us a final function that should look something like this:
onPressPrintToPDF: function(){
    this.getView().getModel("settings").setProperty("/visible", false);

    const oOptions = {
        margin: [0.3,0,0.5,0],
        filename:     'testing-pdf-print-nathan.pdf',
        image:        { type: 'jpeg', quality: 0.98 },
        html2canvas:  { scale: 2 },
        jsPDF:        { unit: 'in', format: 'letter', orientation: 'l' },
        pagebreak: { avoid: 'tr' }
    };

    const element1 = this.getView().byId("SAPUI5content").getDomRef();

    html2pdf().set(oOptions).from(element1).save();

    this.getView().getModel("settings").setProperty("/visible", true);
}
Running the print again
The button still exist?! what gives?
This as best I can tell is because we're too fast when it comes to changing the visibility of the button and as such we need to wait for our PDF print to be finished before we set the visibility back again.
Thankfully the html2pdf function returns a promise which means that we can await on the html2pdf function and then set the visibility.
So, add the keyword await before our html2pdf line and set the function to "async" which is as follows:
our async function definition
onPressPrintToPDF: async function(){
our await
await html2pdf().set(oOptions).from(element1).save();
Final print

TL;DR what was the final function?
onPressPrintToPDF: async function(){
    this.getView().getModel("settings").setProperty("/visible", false);

    const oOptions = {
        margin: [0.3,0,0.5,0],
        filename:     'testing-pdf-print-nathan.pdf',
        image:        { type: 'jpeg', quality: 0.98 },
        html2canvas:  { scale: 2 },
        jsPDF:        { unit: 'in', format: 'letter', orientation: 'l' },
        pagebreak: { avoid: 'tr' }
    };

    const element1 = this.getView().byId("SAPUI5content").getDomRef();

    await html2pdf().set(oOptions).from(element1).save();

    this.getView().getModel("settings").setProperty("/visible", true);
}
Conclusion
That's it! We've successfully printed a single page using html2pdf, there are many more options and settings you can set within the docs but this is a great example of how quickly you can setup a PDF print of your application while omitting some of the useless buttons.
This isn't the best application to show this off and our css isn't perfect, I will say that I struggled with certain components to render properly within the PDF so please keep in mind that not everything will necessarily render perfectly.
I continue to be a bit slow at doing blogs this year as I've been fully busy with client work and not finding much inspiration for new posts, please reach our if you've got an idea that you'd like me to cover in the comments and I'll give it a go!
···
