
SAP IRPA, a simple workflow using excel automation
Introduction
Lately I've not been working on my usual UI5 applications as there was a new requirement with a client to work on Intelligent Robotics Process Automation (IRPA), making bots to assist with their reduced capacity during lockdown.
In this blog post I'm simply going to focus on getting started with excel automation, so if you're looking for a setup guide goto the docs.
Additionally there are loads of posts about IRPA, when, where and why you should use it so I'll keep that out of here too as.
This post will include some pretty basic grabbing of excel data, but I hope I showcase some of the steps on how to use the desktop studio as well to help people out for later posts.
What should you already know?
You should already have installed and setup IRPA desktop studio with all the pre-requisites and ideally already created at least a simple 'hello world' bot.
I would expect that you might have run through some of the OpenSAP courses (course 1, course 2, course 3) and you would ideally also be familiar with JavaScript in general as while you can do quite a bit with just the drag and drop tool sometimes you just can't substitute custom code.
Excel automation
Excel is without a doubt one of the bits of software that we're going to end up automating a lot of with the use of IRPA. This is because Excel is for humans and we're looking to replace the repetitive and mundane tasks that humans need to do so they can focus on the important stuff.
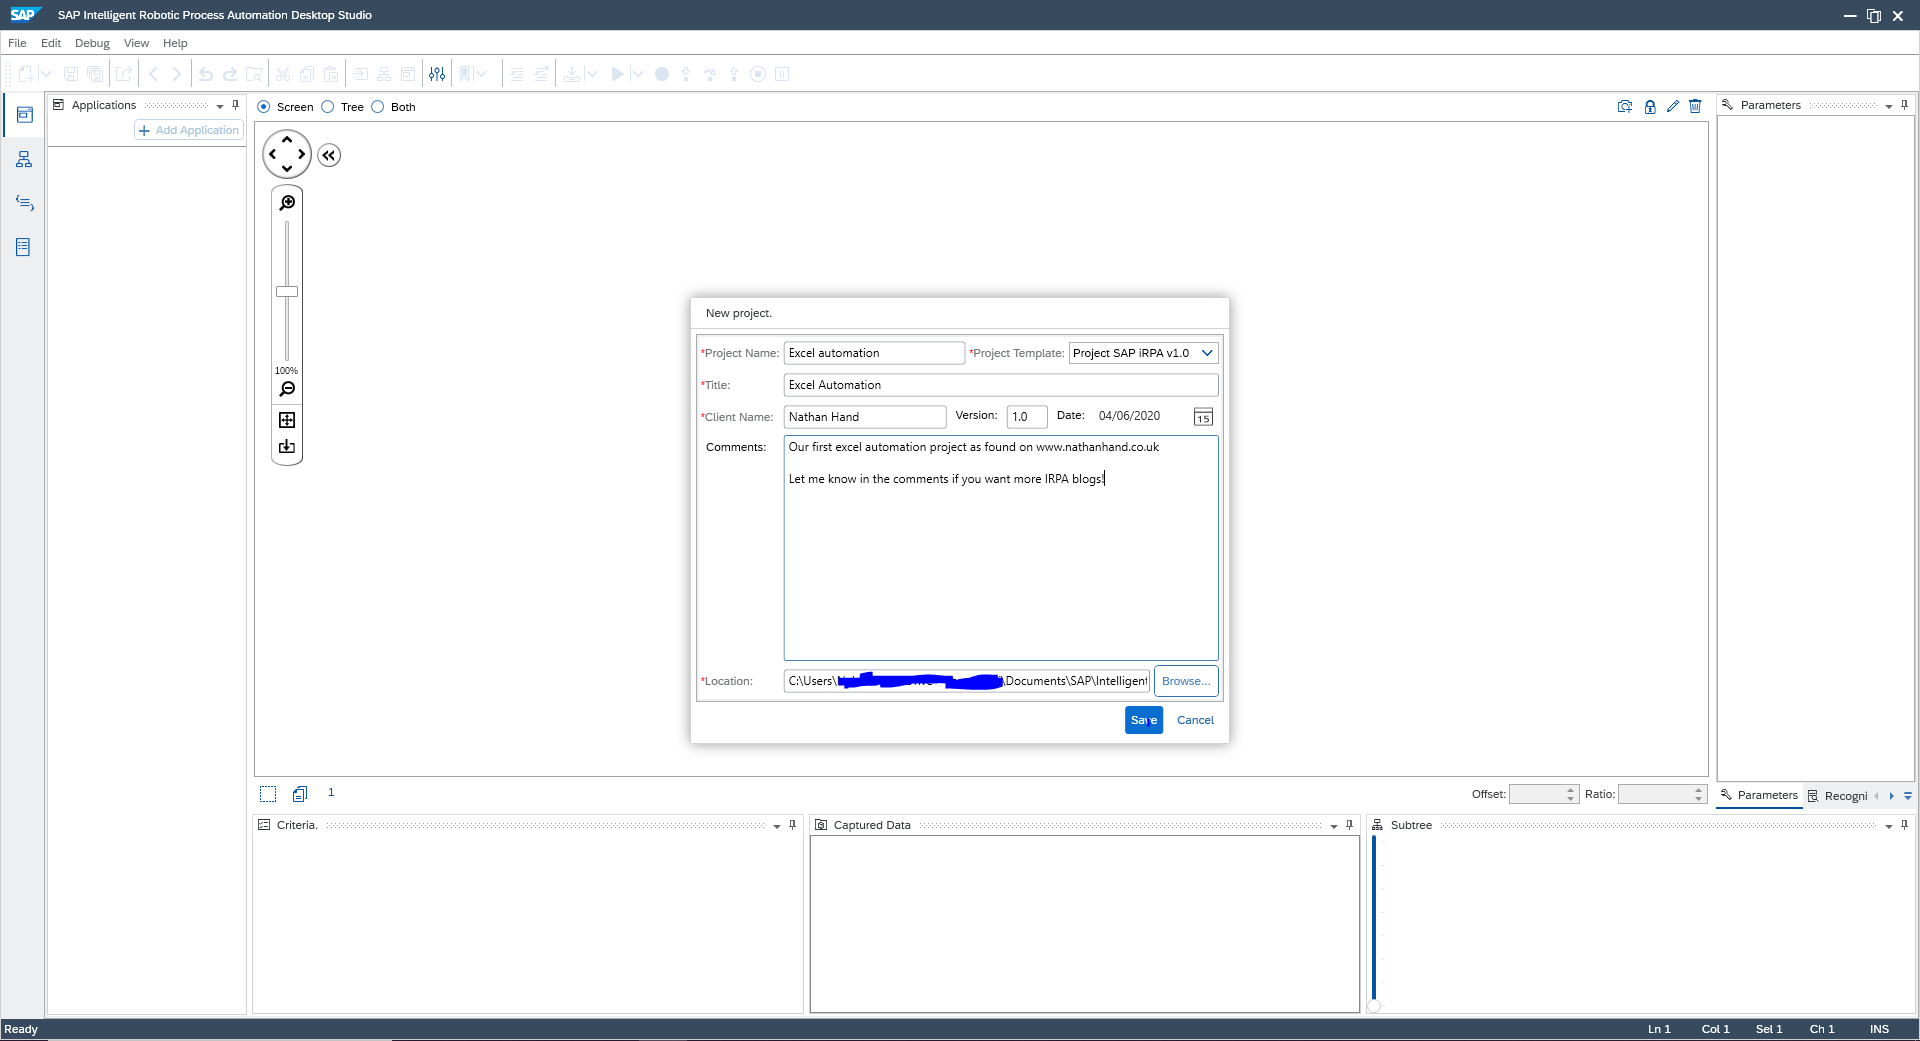
New project, import the library.
Open up Desktop Studio, select file, new project and give everything a nice name as I have below:
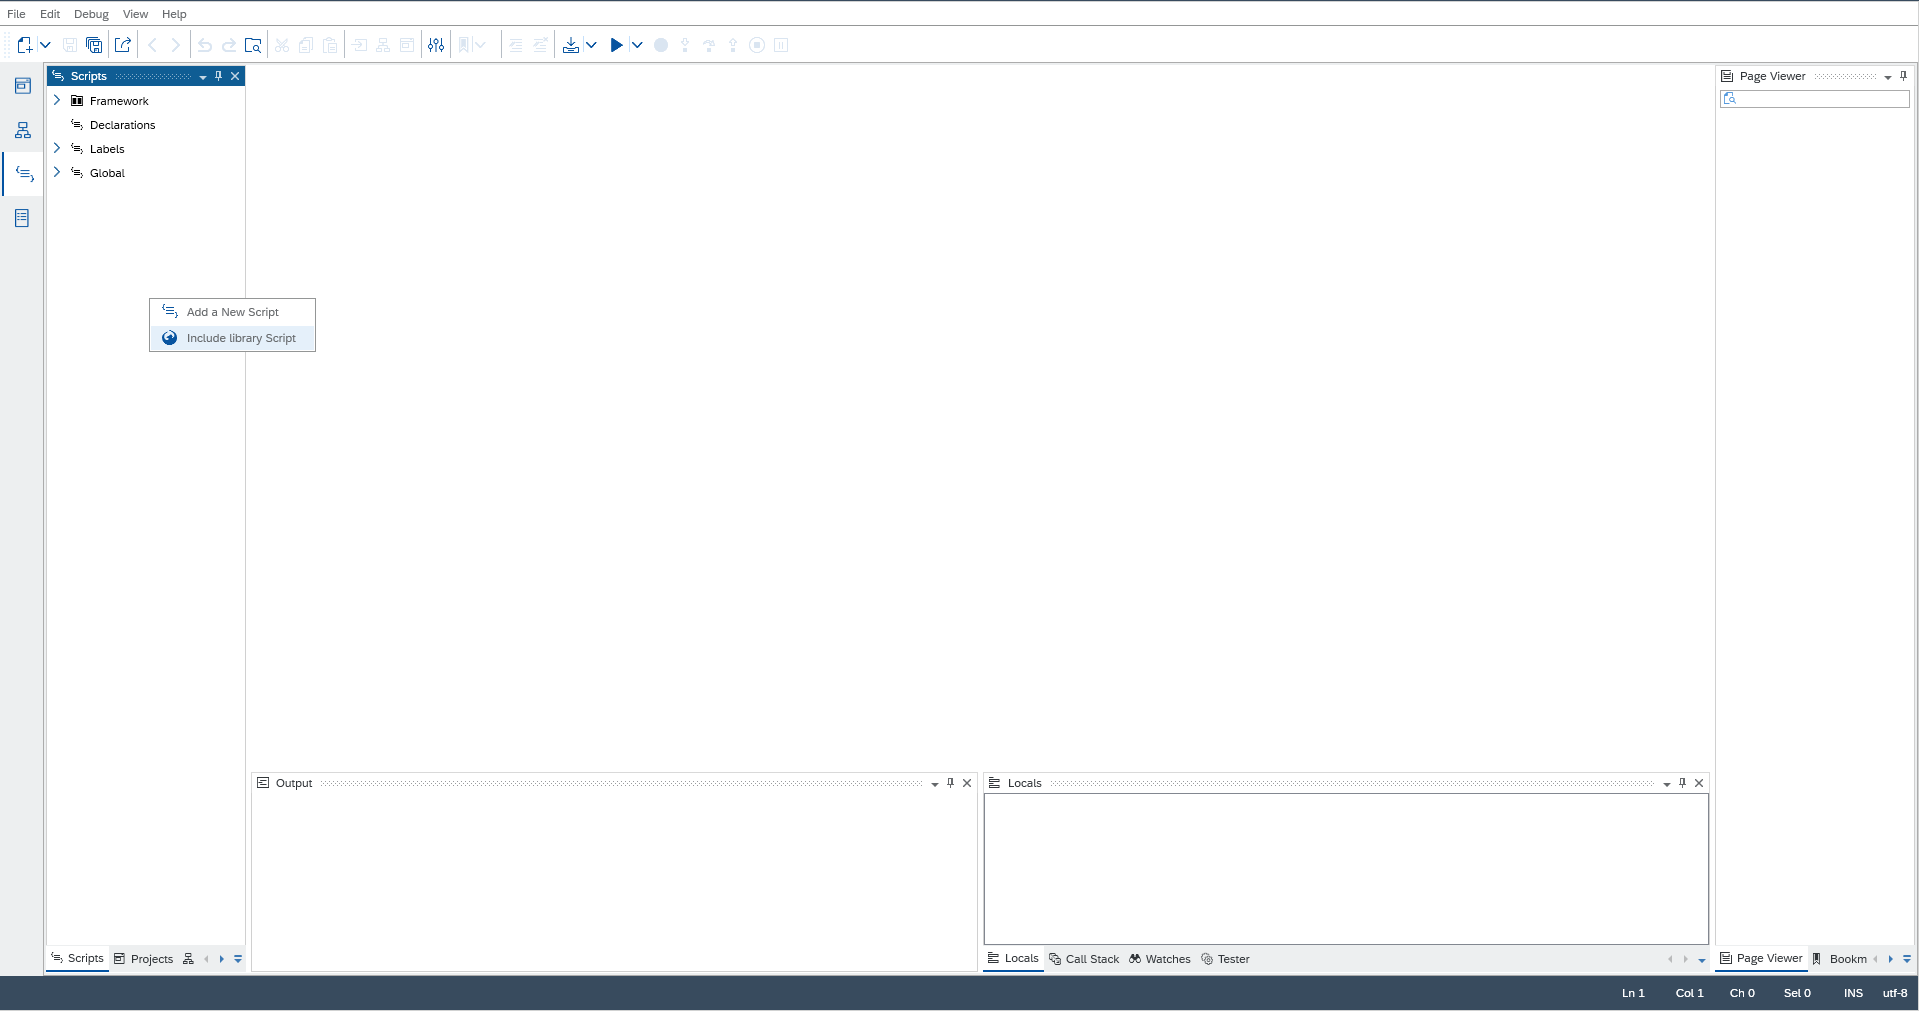
Next we want to import the Excel library which can be done by selecting the 'scripts' section on the left-hand side and then right clicking within the scripts panel and then selecting 'add a library script' as below:
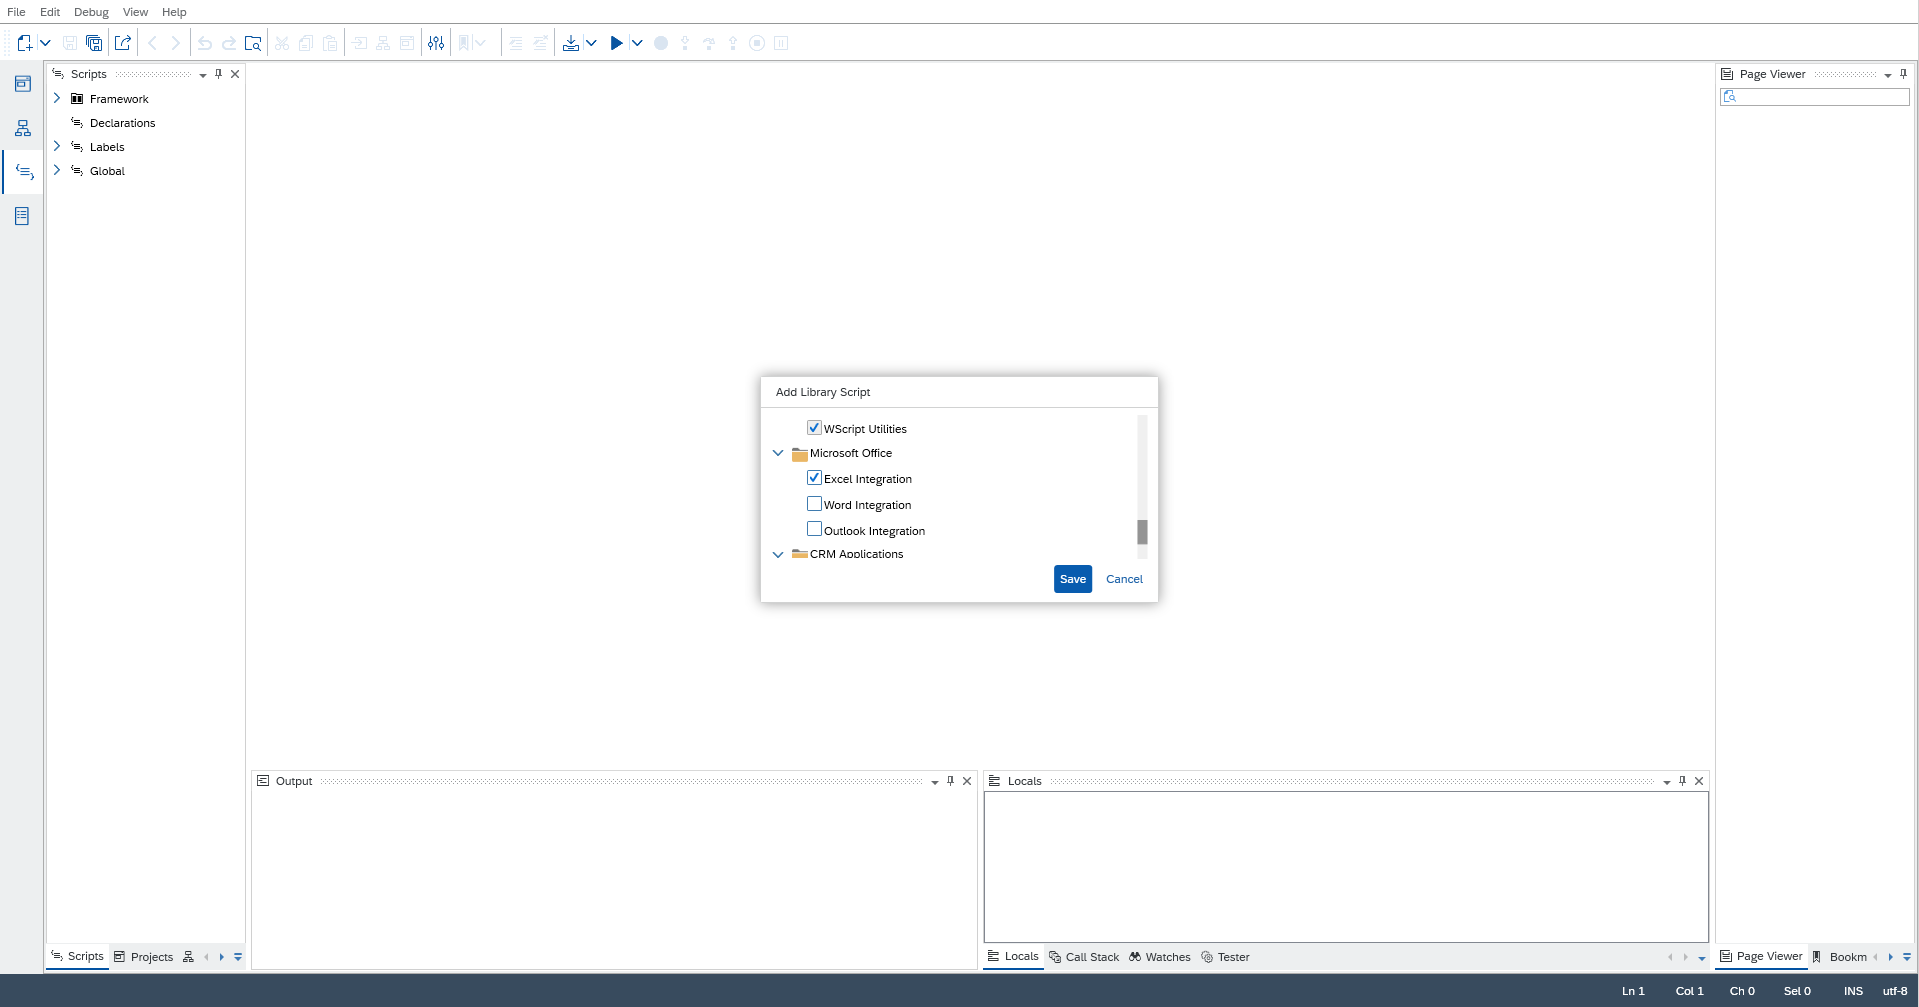
Then finally scrolling down to find the section for 'Microsoft Office' and finally 'Excel Inegration' and click save:
New workflow, start and open excel
To create a new workflow we simply need to click on the 'workflows tab' on the left hand side and then within the workflow panel right click and select 'new workflow' as below:
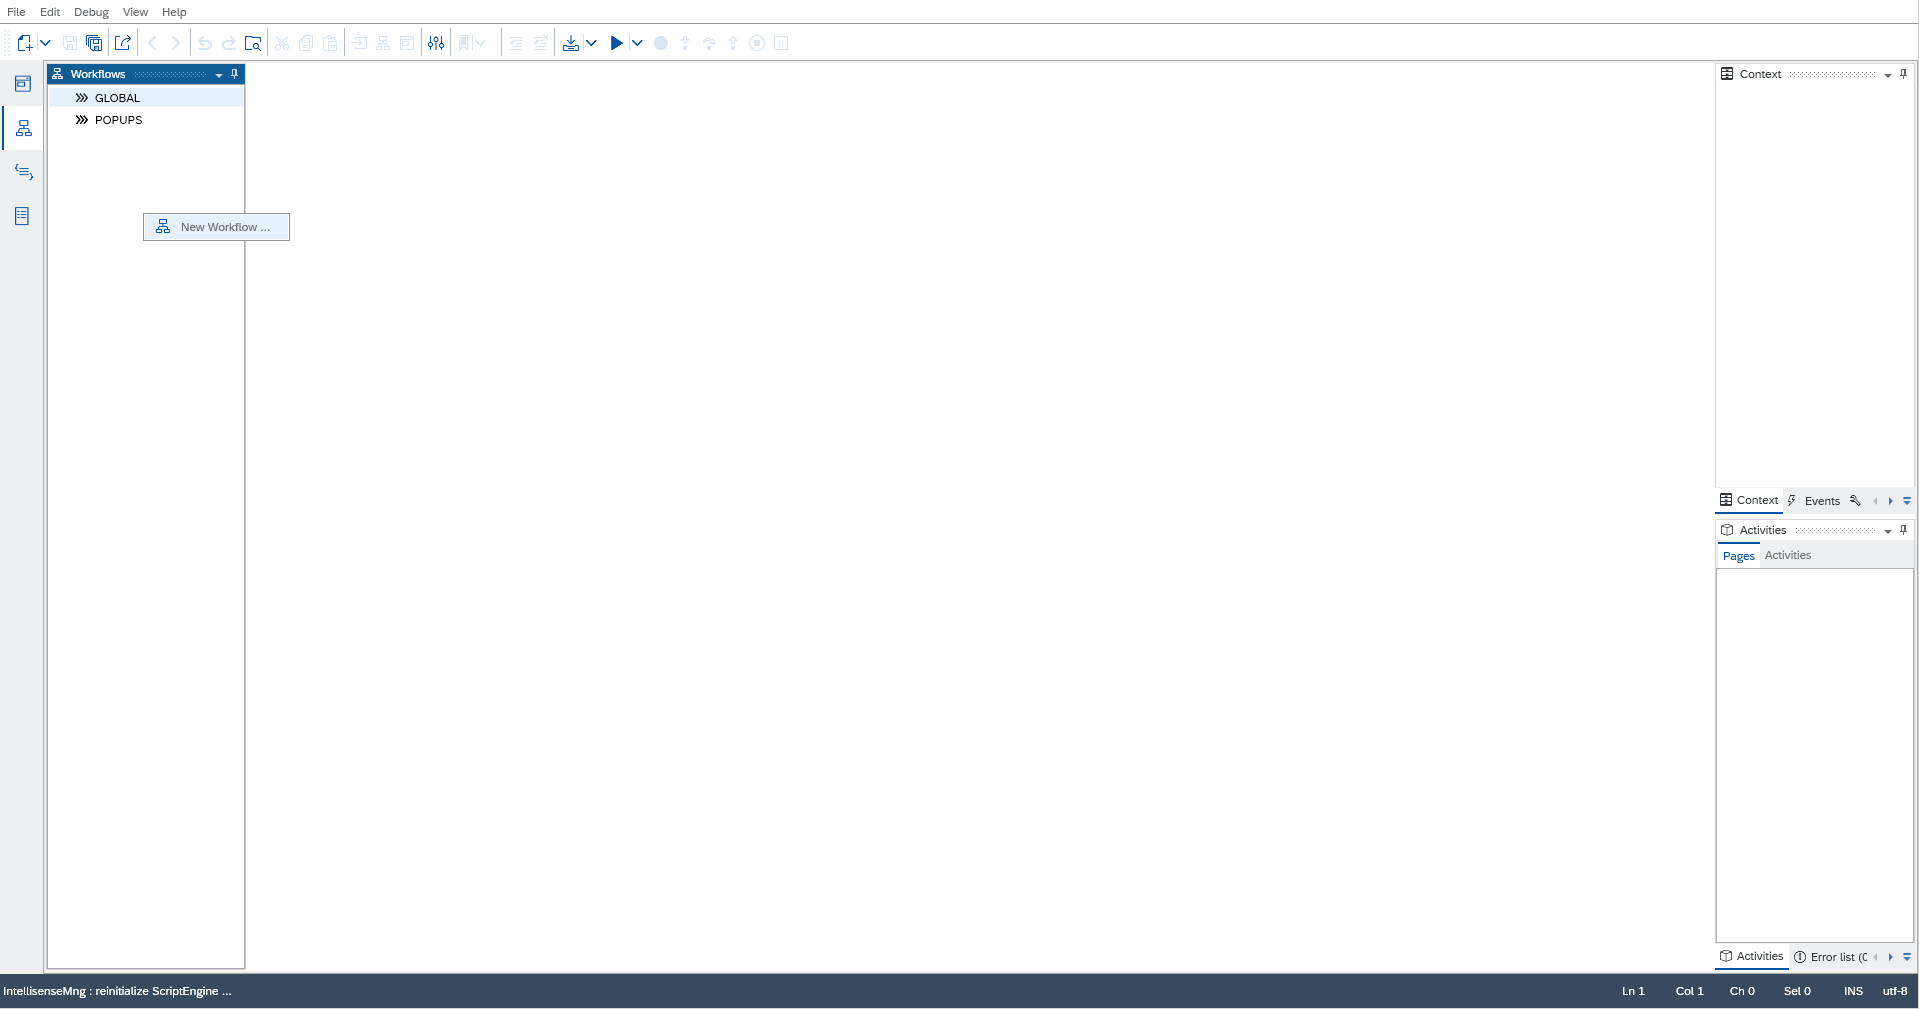
Then just give the new workflow a name and click save.
Add all our workflow activities
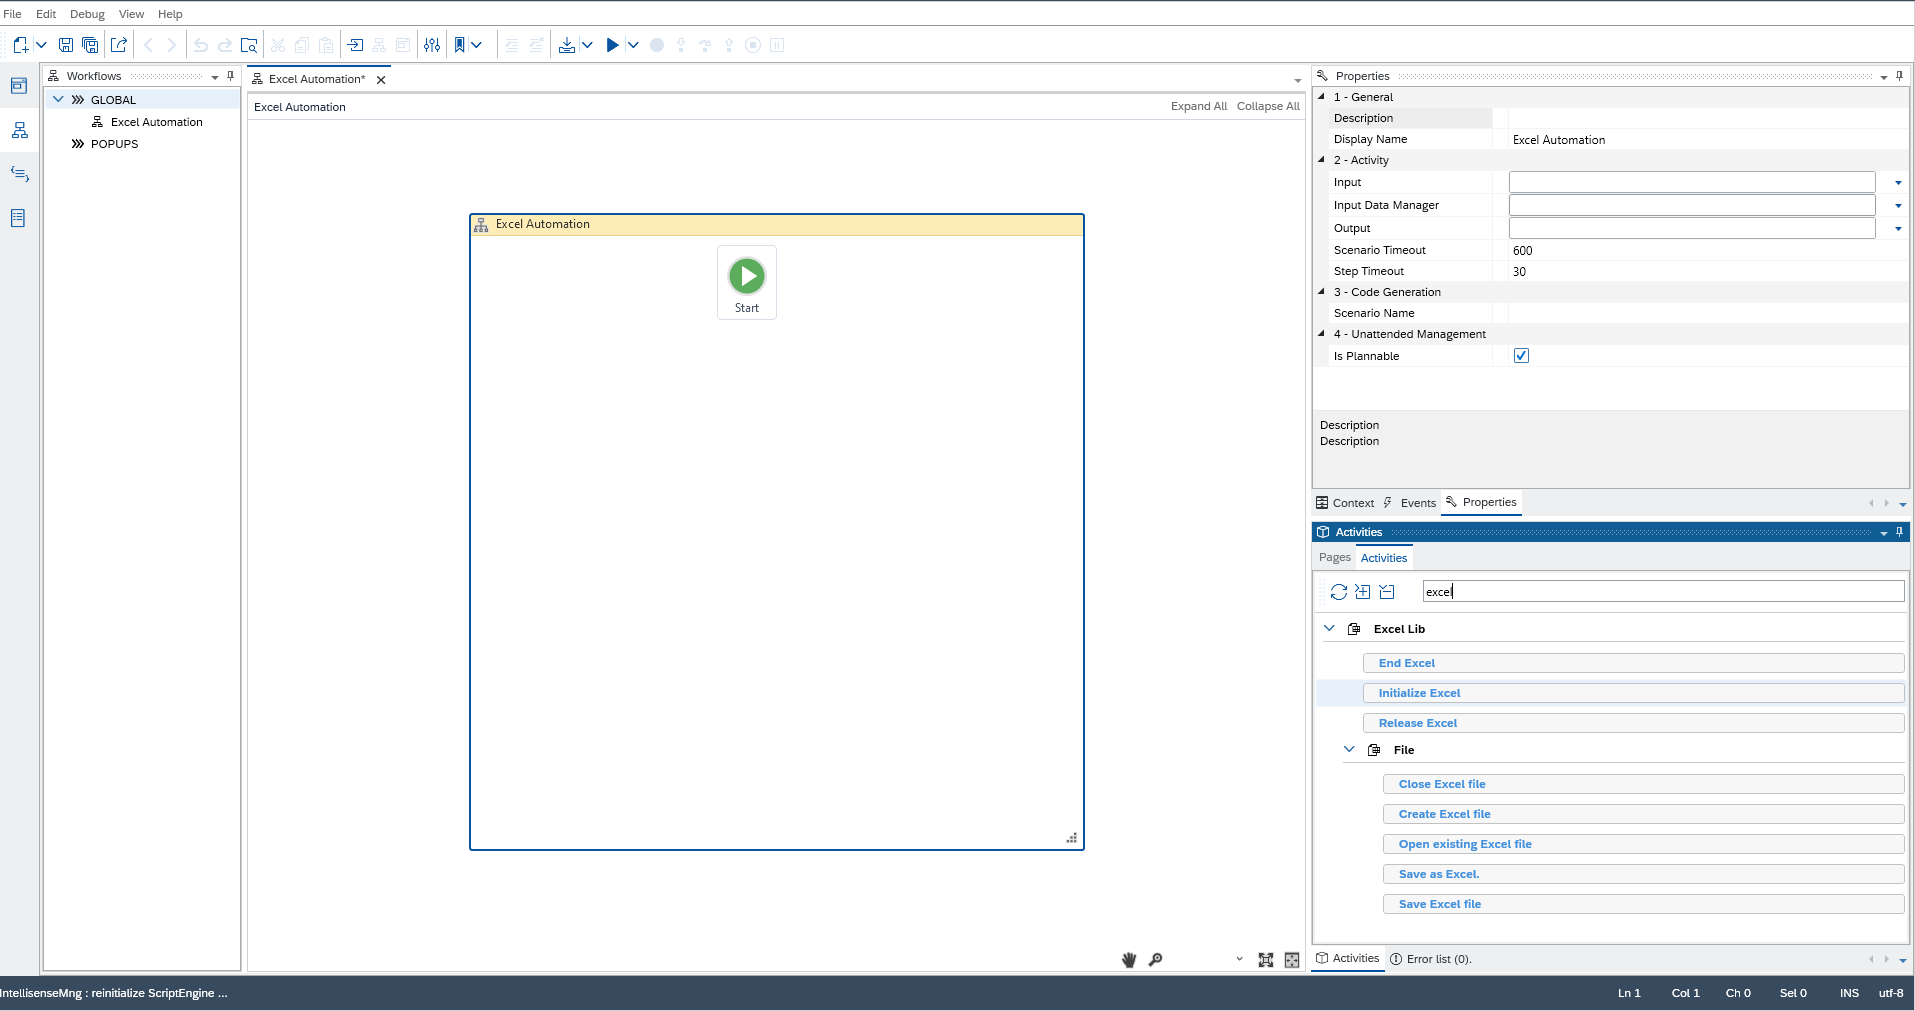
In the bottom right panel within our new workflow you will see an 'activities' tab and this tab will contain a number of activities that we can do within IRPA.
Today we're going to focus on Excel, so within the filter just type in excel and you'll get lots of the activities we want to perform as below:
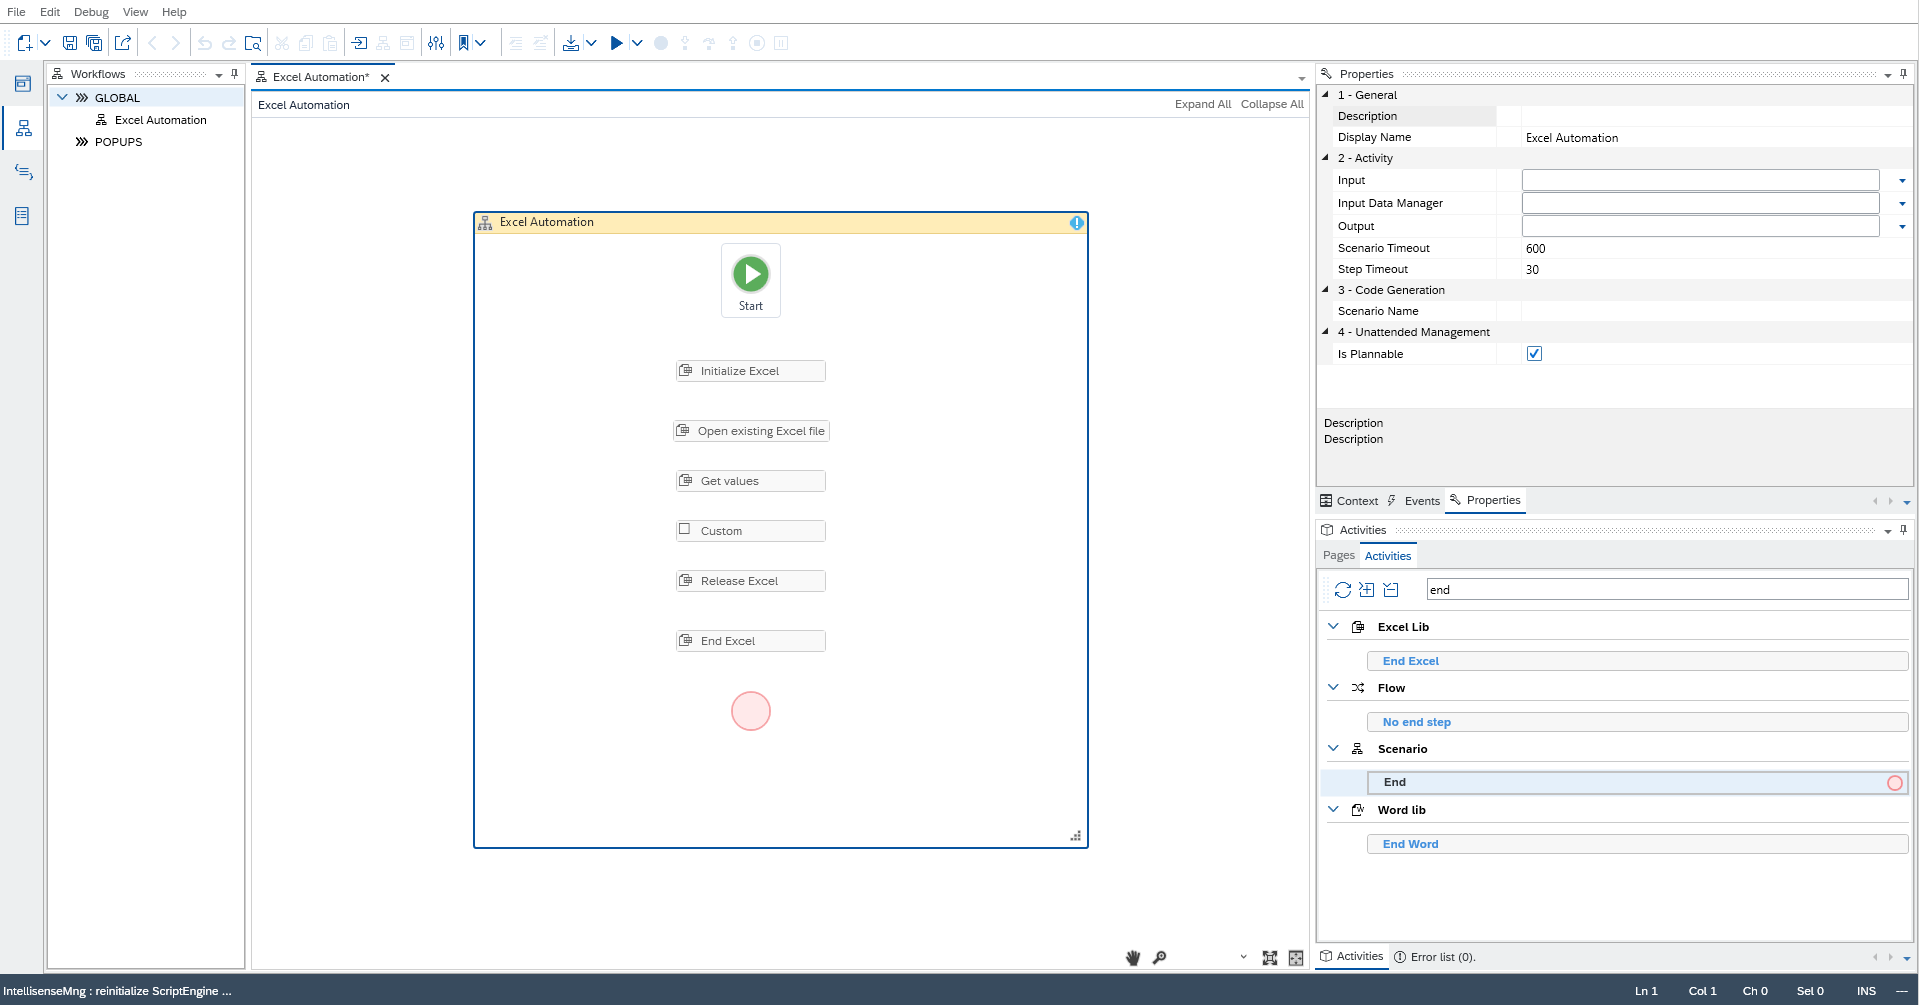
From the various list of activies I'm going to drag out in order 'initialize excel', 'open existing excel file', 'get values', 'custom', 'release excel', 'end excel' and finally 'End' (found under scenario).
With all of that done your new workflow should look something like this:
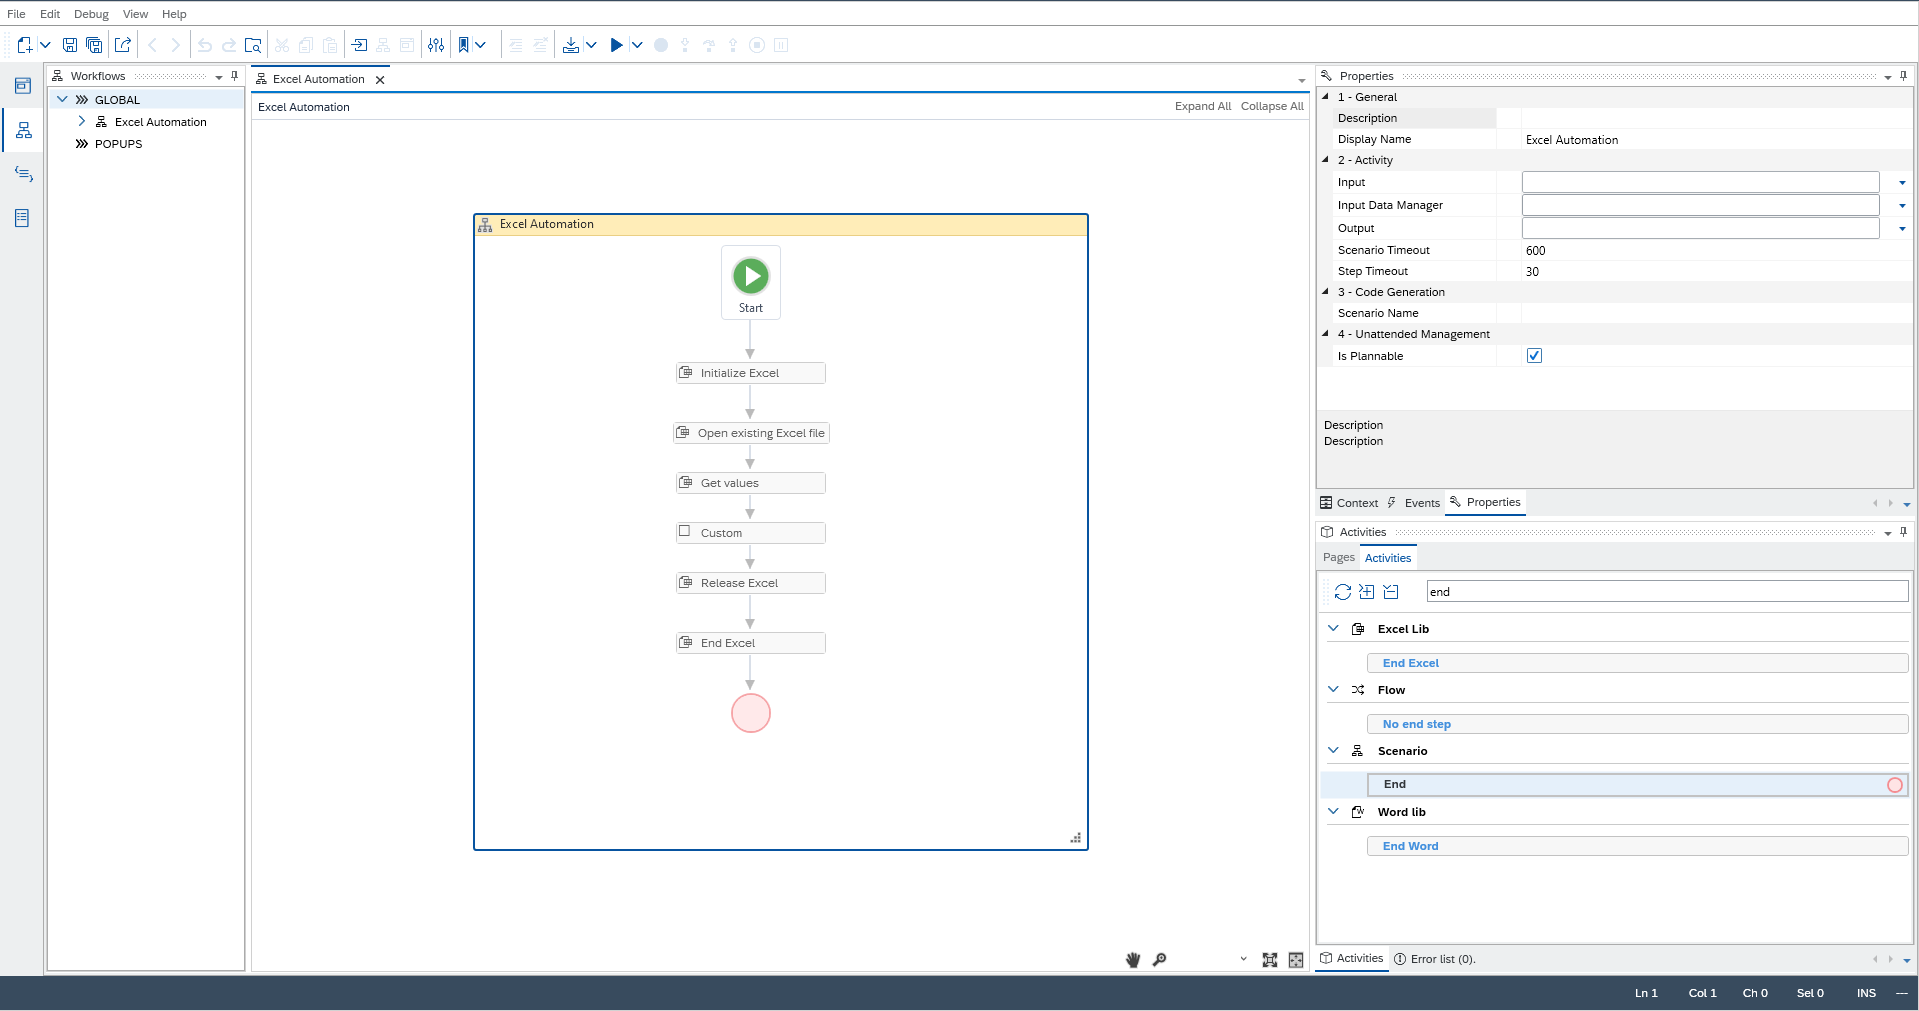
and then we want to join up the different workflow activities so similar to how we might see in a flow chart you'll see little squares when you hover over an item. What you need to do is drag from those squares and match them up with the next item in the sequence which when complete will look like this:
Open our excel file
Now clicking on our 'Open existing Excel file' activity we should see the properties of the activity open up in the top right area of our studio as so:
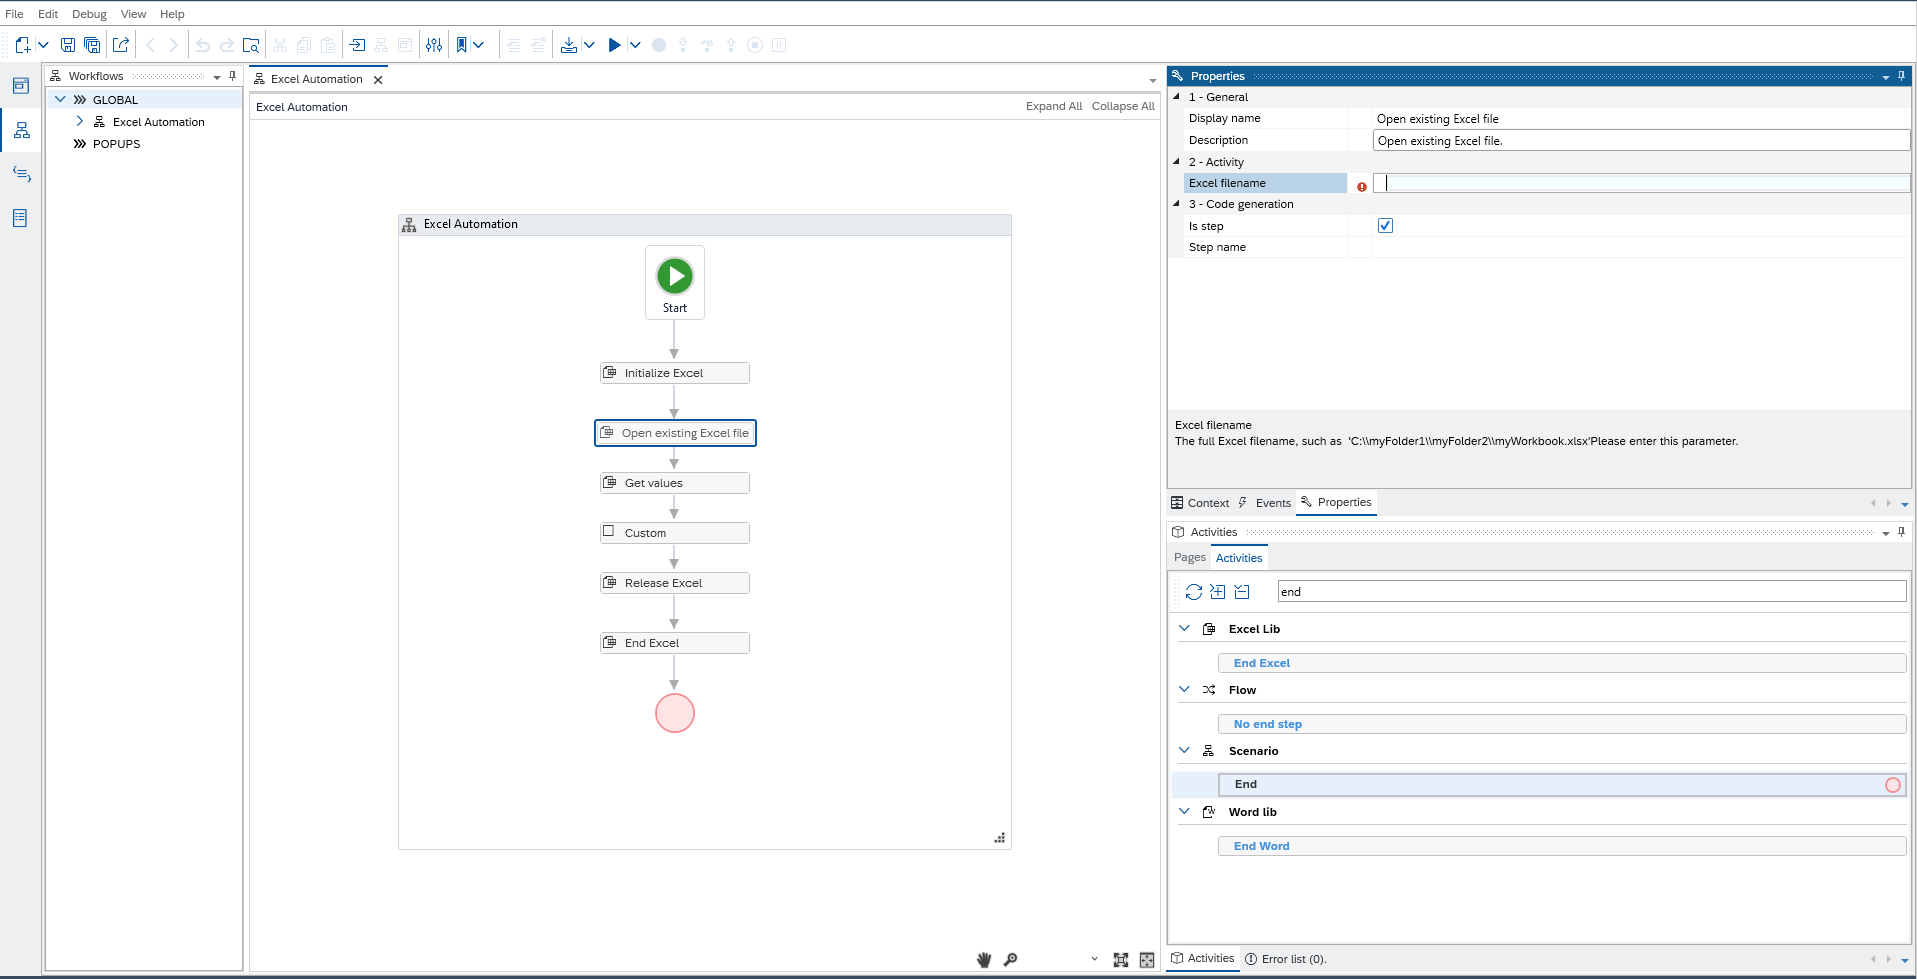
within the 'excel filename' property we're going to add the path to our excel. Please make special note of the fact that you will need to escape the '\' which in this case means entering another '\' infront of each '\' so they're read properly. If you're getting any error related to being unable to open your excel file/ file not found then this is likely your problem!
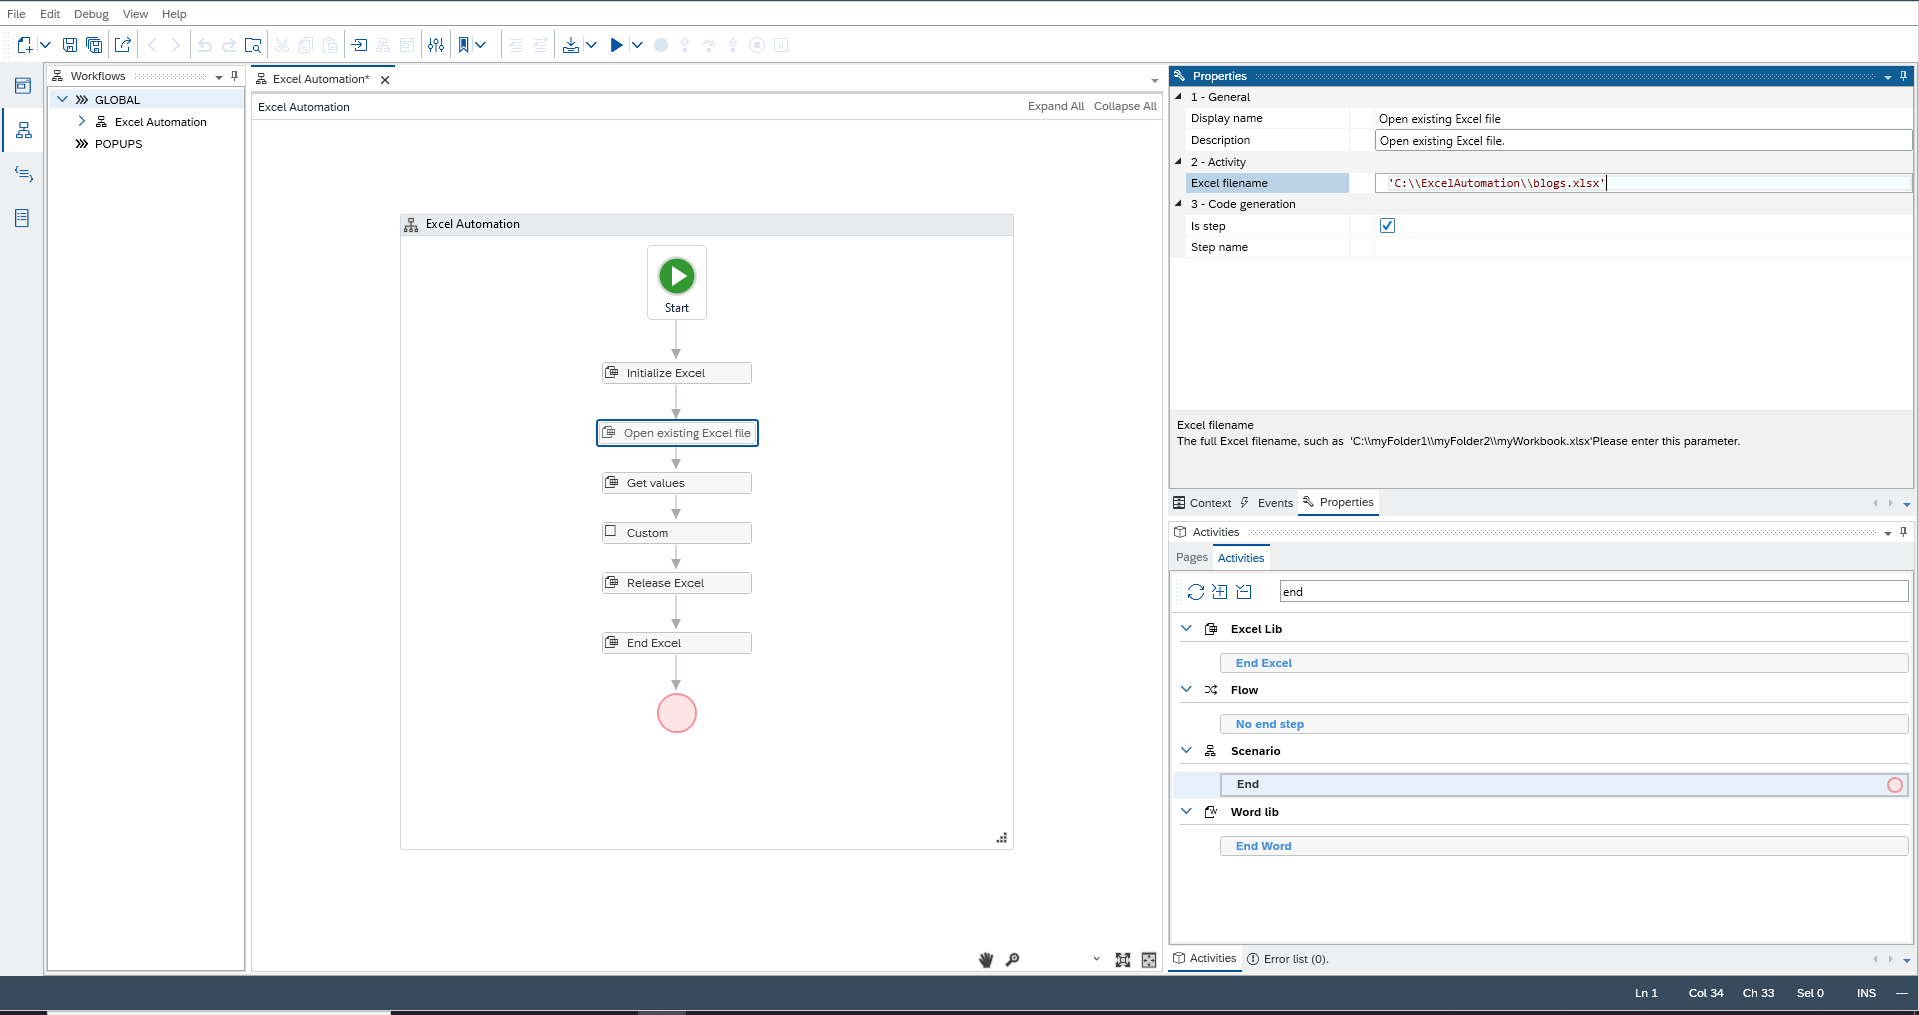
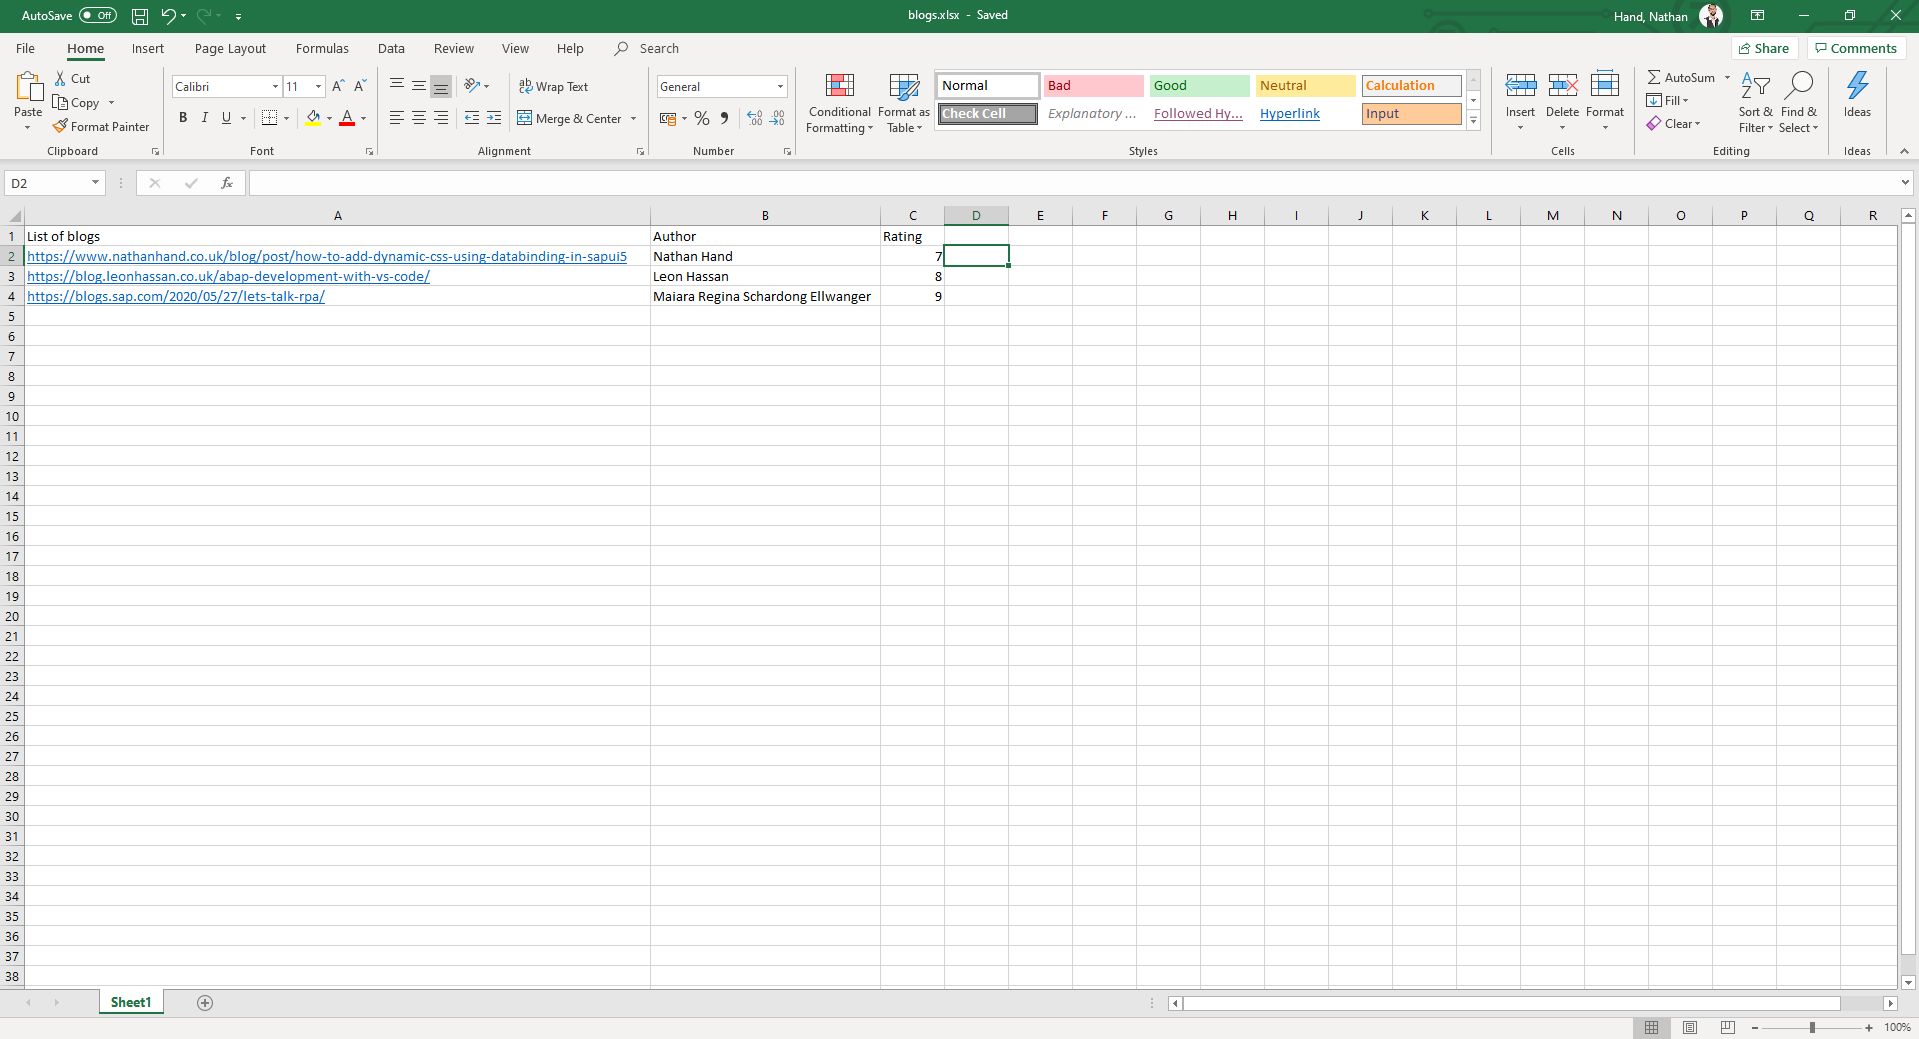
As you can see mine is just simply located and is a list of blogs with some other fields.
Get the values
Clicking on our 'get values' activity we will be presented with a large number of properties to enter which I'll fill in for my example as below:
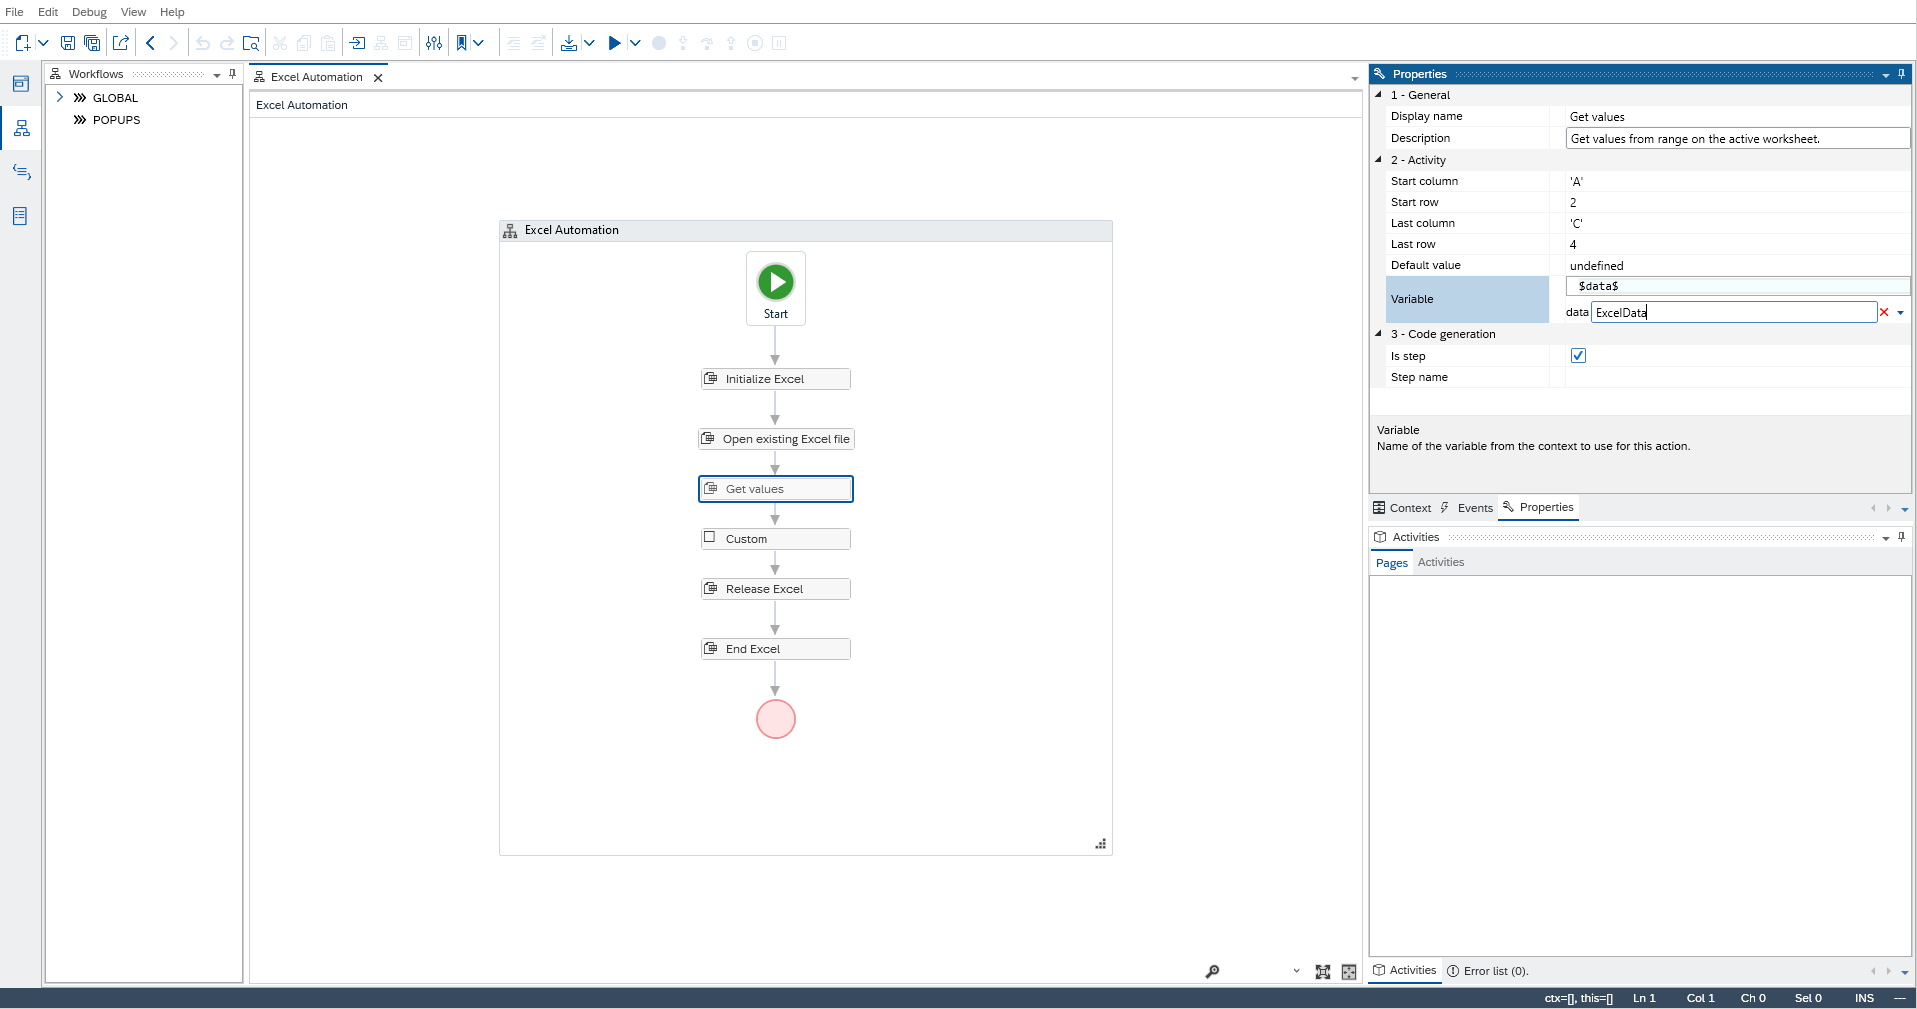
The 'variable' section is the name of your variable that you're going to store this read into, so can be called anything you like.
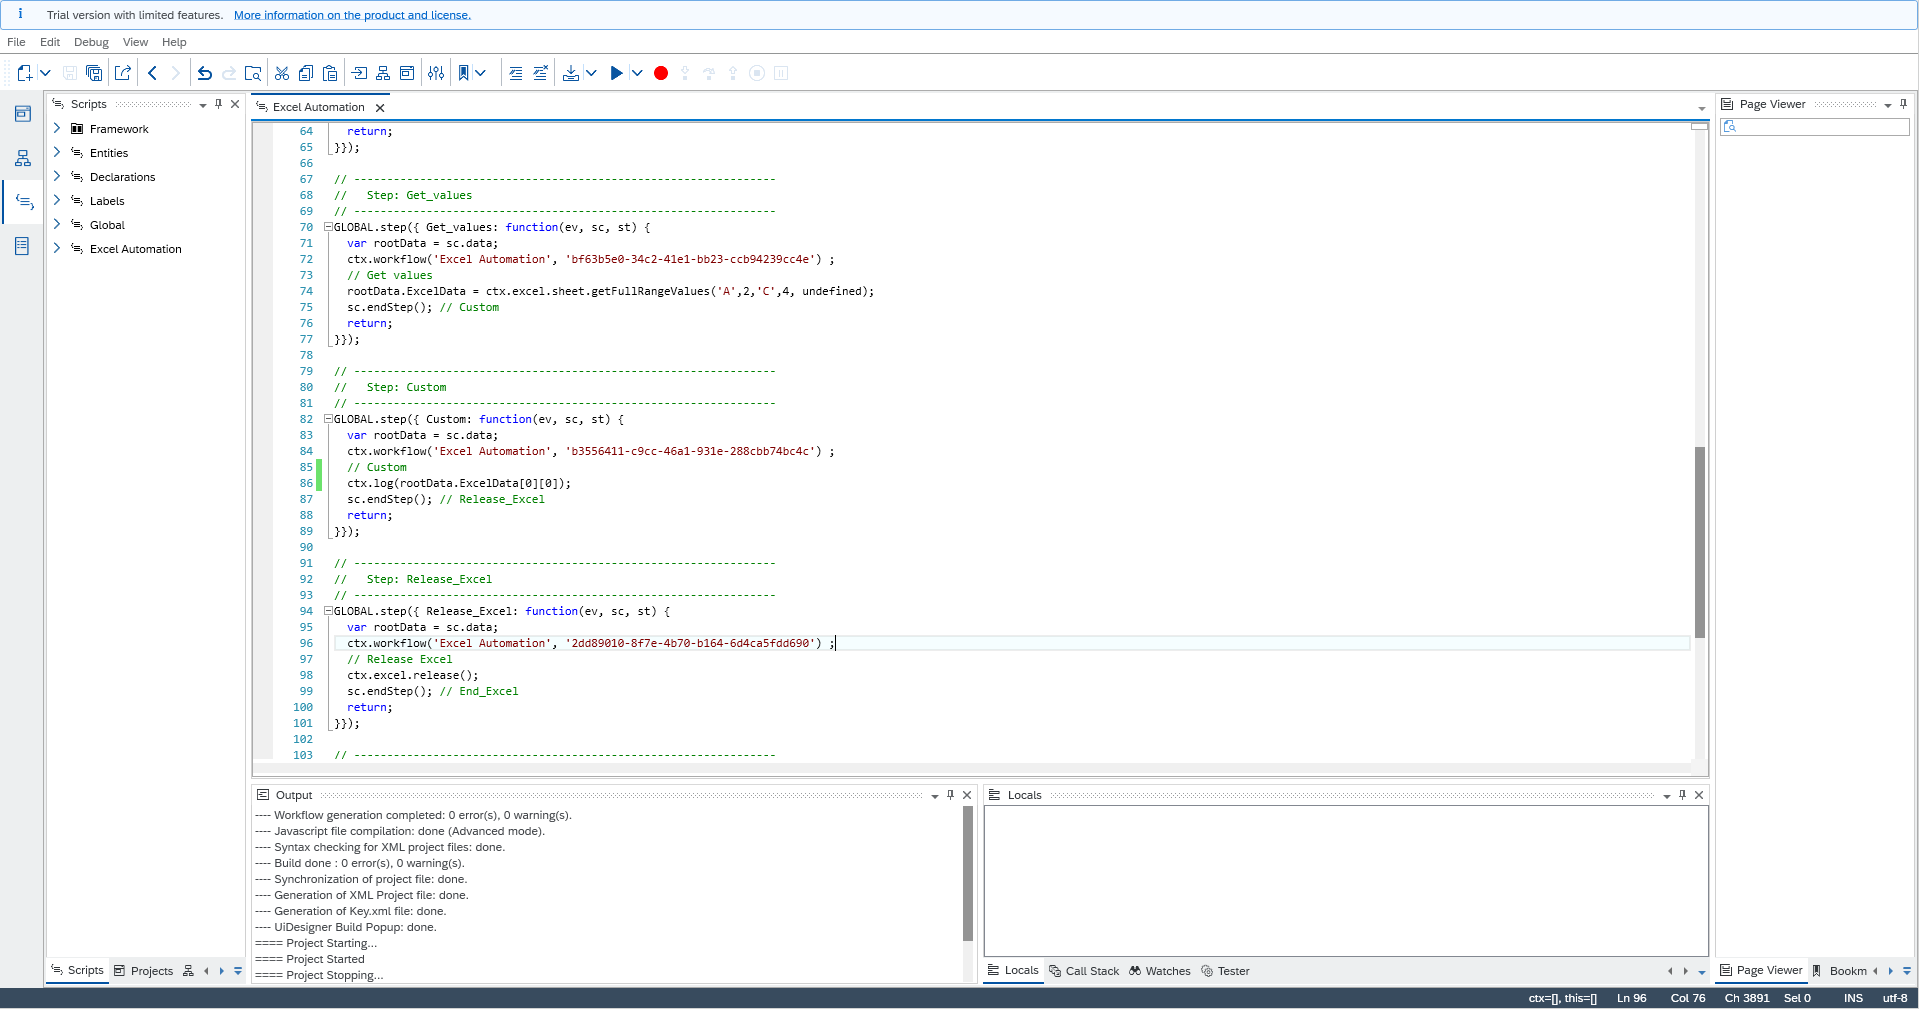
Log our output
First of all we're going to be writing some custom code, so if you've not done so upto now I would suggest you click 'build' on your project before going any further/ adding custom code.
In our 'custom' block I'm just going to log our data and as such will be a very simple line to log the information inside of our variable as defined above.
so right click the 'custom' activity and select 'goto code' and then within our code we need to add our new line of ctx.log(rootData.ExcelData[0][0]); which will give us some custom code like this:
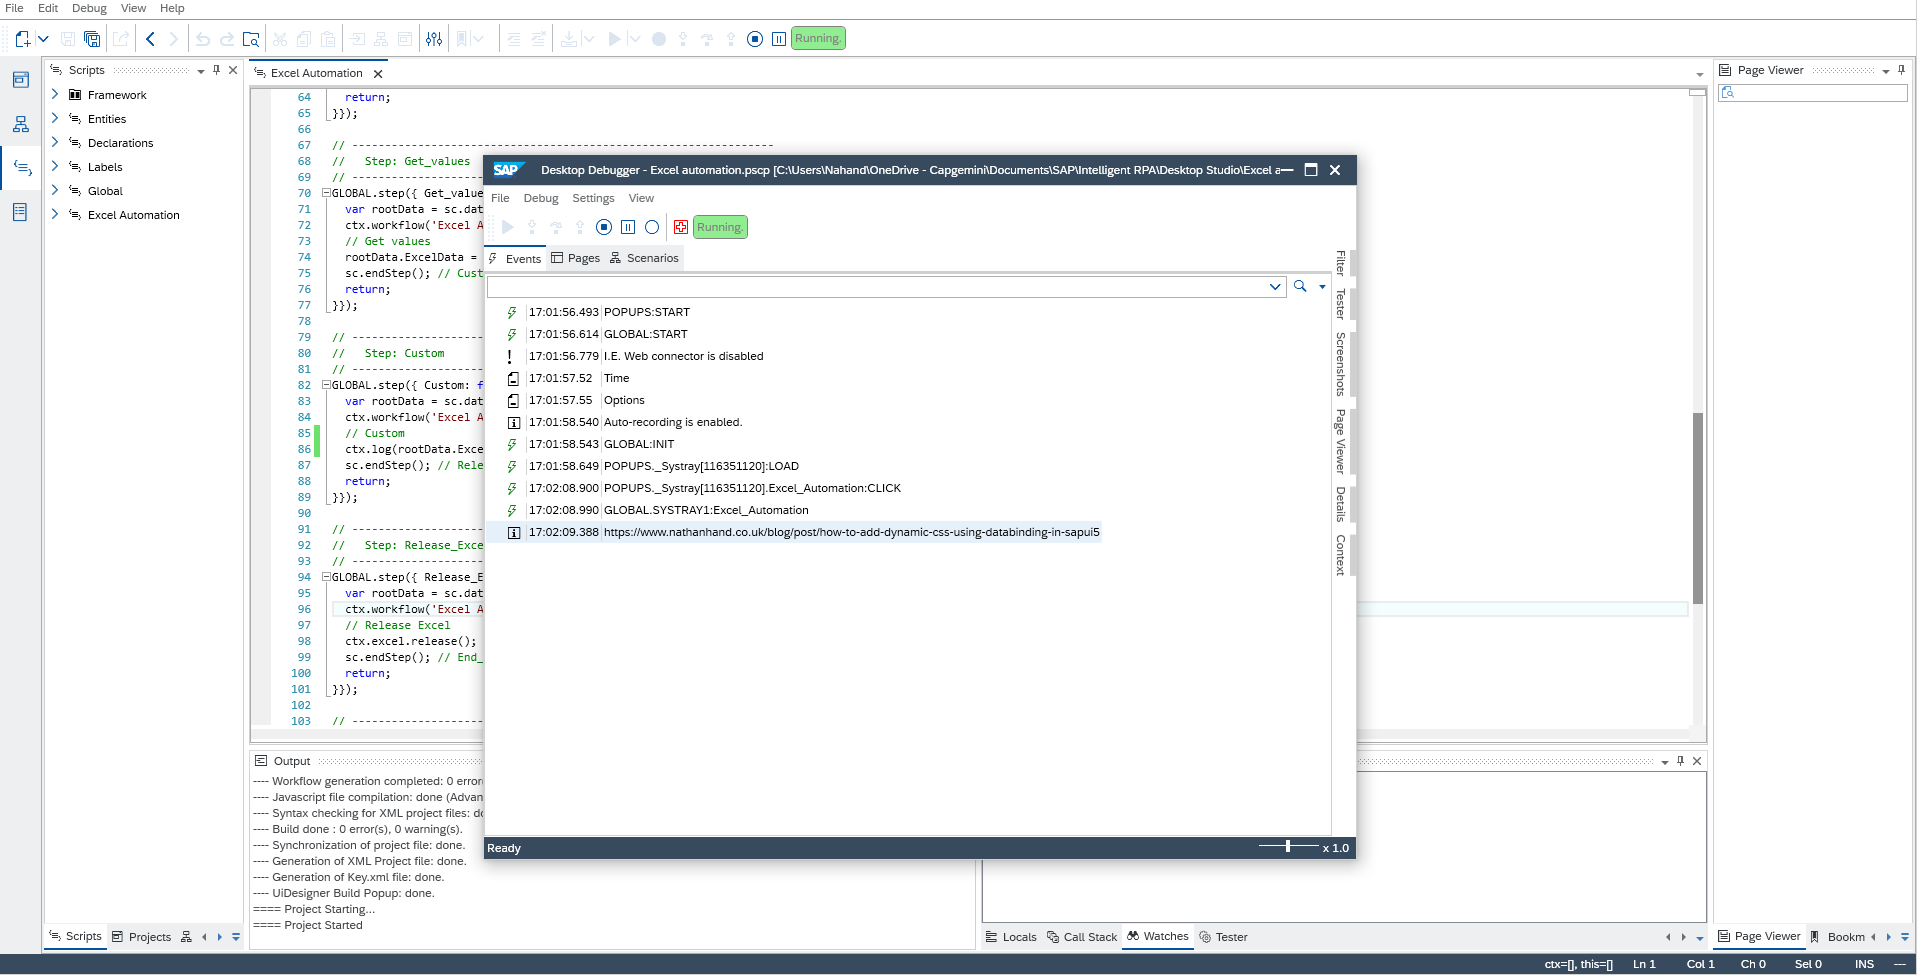
and next click 'build' and finally we can click run/ debug. Note if you've not already registered your tenant then you will be prompted to do so, please register the tenant by following the docs
When I run this workflow I then log the first items first row such as the below:
Which matches up with the first item in our excel that we grabbed which was the cell A2 due to our 'get values' activity and our excel looks like this:
Conclusion
We've made it through our first excel automation! It was really simple but I think it showcased the basic steps that we'll follow for all our future blogs and workflow creations.
I understand this isn't what everyone is used to in terms of my usual posts, feel free to let me know if you liked it in the comments or anything you'd like me to look at in terms of IRPA in the future.
···
